Looker is a popular Business Intelligence and data analytics platform that allows you to explore your data for actionable, business-oriented insights.
You can now use Looker as a data source to send enriched user activities and their associated properties over a period of time to RudderStack. RudderStack then forwards this data to your specified destinations for real-time syncing of the newly created properties and actions.
This guide will help you in setting up Looker as a source in RudderStack.
Setting up the Looker actions
After creating your views in Looker, you need to set-up the necessary Looker actions. Go to your Looker actions dashboard to do this.
Configuring a Looker source in RudderStack
Follow these steps to set up your Looker source in the RudderStack dashboard:
- Go to your RudderStack dashboard and click Add Source. From the list of Event Streams sources, select Looker.
- Assign a name to your source and click Continue.
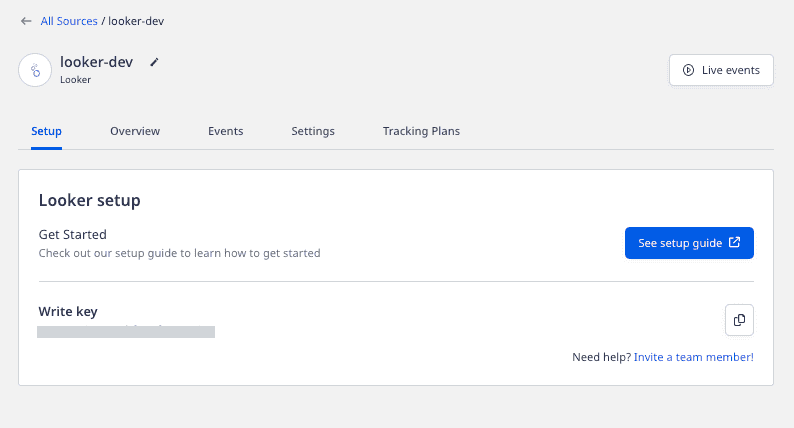
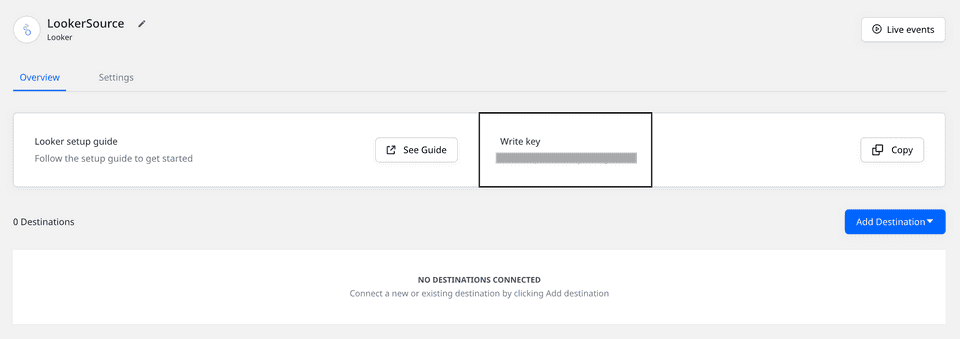
- Your Looker source is now configured. Note the source Write key, as shown:

Adding the RudderStack Action Hub Server
This section describes the steps required to enable the RudderStack actions in Looker.
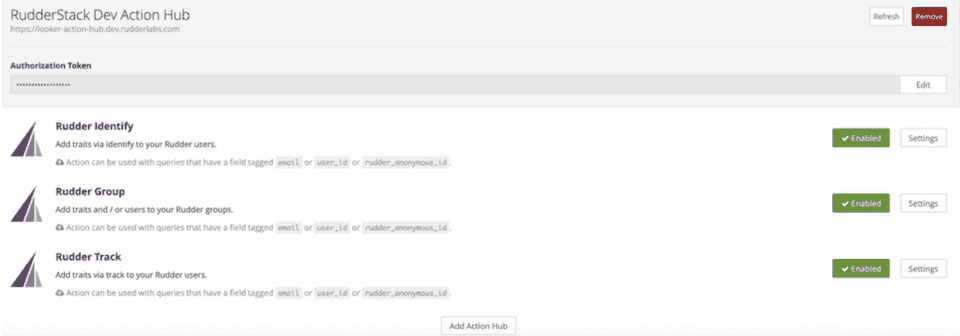
RudderStack hosts a Looker Action Hub Server that communicates with your Looker instance.
You will also require an Authorization Token to access the Action Hub. The token to be used is as follows:
75805209b45a55494d0c27d4eb91fbf6bc7fb1a63dfcd9260fe65daee584737b/ea4e074e71c1af9c07bf71f69c1addf7b9a30d458bd7aea4b4e60d6a6a122277b59210186edb7cf21a5ff53a29c68fb89ff5aaf5019570c8a5131484a11e2e3eOnce you connect the Action Hub Server to your Looker instance by clicking the Add Action Hub button present at the bottom of Looker actions dashboard, you can start viewing the following three RudderStack actions:
| Actions | Description |
|---|---|
| Identify | Adds the traits to your RudderStack users via the identify event. |
| Group | Adds the traits or users to your RudderStack groups via the group event. |
| Track | Adds the user properties for your users via the track event. |

Configuring the actions
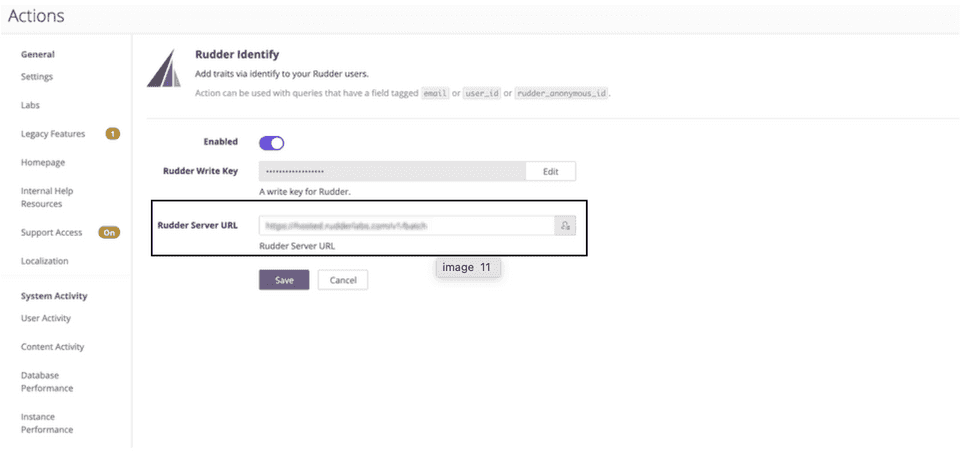
- To enable any of the above actions, click the Settings button.
- Enter the Write key obtained after setting up the Looker source in RudderStack.

- Specify the Rudder Server URL to which Looker forwards the user looks data. The URL is
https://<your-dataplane-url>/v1/batch. For more information on obtaining your data plane URL, refer to the RudderStack Glossary.

Once the connection is successful, you should start seeing the RudderStack actions.
RudderStack actions overview
Once configured, RudderStack actions will start sending the query results to RudderStack.
When defining the columns for the Looker models attached to the user looks that you want to send to RudderStack, it's important to tag the user identifier column as email or user_id or rudder_anonymous_id.
Additionally, to use the RudderStack Group action, you need to tag your group identifier column as rudder_group_id.
user_id field always needs to be present even if email is already present.A sample track payload from the look's row data sent by the RudderStack Track action is as shown:
{ "userId": "test@rcomp.es", "anonymousId": null, "properties": { "tracks_flow.event_2": "Destination_Clicked", "tracks_flow.event_3": [
], "tracks_flow.event_4": [
], "tracks_flow.event_5": [
], "tracks_flow.event": "User_Logged_In" }, "event": "single", "context": { "library": { "name": "analytics-node", "version": "0.0.3" }, "app": { "name": "looker/actions", "version": "dev" } }, "timestamp": "2020-06-18T08:21:01.644Z", "type": "track", "_metadata": { "nodeVersion": "12.13.0" }, "originalTimestamp": "2020-06-18T08:21:03.049Z", "messageId": "node-c33eb51666f6470bf4aa415c7431aba4-ffd5e198-05a1-477a-9c2c-85be30749b8b", "sentAt": "2020-06-18T08:21:03.050Z"}view name.column name in the payload sent to RudderStack. If you want to change the names as per your destination, you can do so using RudderStack's Transformations feature.Contact us
For more information on the topics covered on this page, email us or start a conversation in our Slack community.